Wednesday, 31 March 2010

Prime Loops @ Musikmesse 2010

The Prime Loops Team has just got back from Musikmesse in Frankfurt, Germany, and we had a ball!

Great to meet all the other software and hardware companies, and the friendly German peoples!

Here you can check out some of our personal highlights that we picked up along the way:

Brand new hands-on synth by Roland - GAIA SH-01

A return to the roots of Roland's ground-breaking past, this small synth delivers a massive punch with 3 oscillators, scores of effects, D-beam sensor (for an excuse to do some impressive looking hand-movement live to change parameters), USB connectivity and probably coolest of all, having the entire signal chain in front of you in dials, buttons and faders, rather than navigating awkward LCD displays.   Seems pretty cheap too!

"Djay software" by Algoriddim 

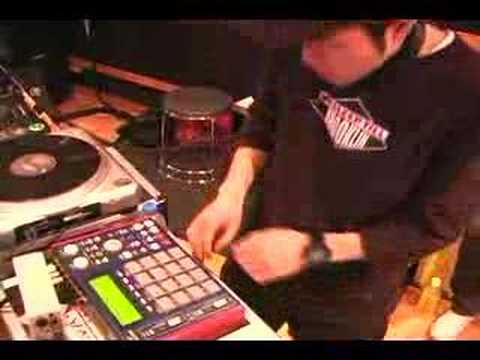
As iTunes becomes the centre of more and more people's music library, it was inevitable that DJing technology would latch onto that.   Algoriddim's software/hardware combo allows for real-time scratching, automatic tempo syncing and mixing your iTunes library.   If it's good enough for The Prodigy, it's got to be decent.

Steinberg announce Wavelab 7 (finally, also compatible with Mac!)

Apart from making the jump to Apple's platform, Wavelab 7 also contains loads of analysis tools, including 3D frequency analysis which sounds awesome, audio restoration tools such as the DeNoiser, DeBuzzer and DeClicker plug-ins and many other top quality plug-ins for Mastering your track.

DrumXchanger analog code plug-in by SPL

For multi-tracked percussion, this could be the answer to all transient processing problems.   Sample replacement, transient designing and an as-before-unseen level of accuracy, this is surely a plug-in to add to your collection if you're planning on working with live drums.

Korg Monotron Analogue Ribbon Synthesizer 

Original vintage sounds for your pocket, at just 50 Euros!   The ribbon controller combined with the analog authenticity makes this another novelty item that every synth geek must have.   It even has its own little speaker, but also a headphone output so you don't end up annoying people by playing with your LFO settings on the train.


Thursday, 18 March 2010

To Quantise or not to Quantise

When it comes to beats, most producers like their kicks to be consistent, their snares to be steady and in general for their percussion to be punctual.

But there is a wave of producers with a different perspective; people who believe that imperfection has a beauty all of its own.   This article will get behind their thinking and compare the pros and cons of quantisation with those of using more wonky beats!


What is Quantisation?

I suppose this is a good place to start - Quantisation is when you constrict a large range of values to a limited set of values.   In music production, this is usually used to talk about putting beats in time.   For instance, if you play in a synth riff into your sequencer, chances are it won't be perfectly in time.

To avoid having to manually go through and correct each note, most programs come equipped with a "quantisation" feature.   This does it for you, putting the notes perfectly in time.   Very useful for the vast majority of music makers, but it's not for everyone...


Why wouldn't I Quantise?

Now, while putting things in time is, in general, a good idea when it comes to music, there's a lot to be said about the human element.   That's why live drums are still used so often - those minute differences that only happen in the real world make all the difference... The changes in velocity, tone and, as we're discussing here, timing.

This timing change can simply add a bit of a shuffle to the beat or it can entirely change it into a new genre of music.   When music is so noticeably offbeat that is no longer considered in time, it gives a whole different feel than a perfectly quantised piece.

In fact, people consider this so important that some programs come fitted with "humanisation" tools, or as I like to call it; "Wonkisation".   Deliberately making the timing wonky for effect.


When not to Quantise

If you want to make something feel more live, then be careful with quantisation.   If it sounds too regimented then the listener will see through your VST and know it was computer generated straight off.   Either by using careful Wonkisation (which deliberately makes the timing a bit off - It may be called "Groove Quantisation" in your sequencer.)

Another completely different way to use wonky beats creatively still retains an electronic feel - A few deliberately off-beat snares and kicks sound like the producer doesn't know what they're doing, but when used consistently it can make for music that entices the listener to nod their head in an entirely different way to conventional in-time recordings.

For genres like Dubstep, Trip Hop and Glitch Hop this can be a fantastic way to add variety between tunes and even develop your own style.   Since most producers tend towards the "highlight all, Quantise" approach, by focusing on the artistic reasons for being out of time you could separate yourself from the crowd!

In conclusion, it draws back to the age-old cliche: "Rules are there to be broken".   If you think it sounds interesting to be out of time, then ignore what convention says; Wonkify your beats to your heart's content!

Wednesday, 17 March 2010

Introduction to Envelopes

A synth with no dynamics is like a cat that hasn't been tasered: They don't move as much and they're not as interesting as they have the potential to be.

Envelopes can help change all that.   They define how a sound works over time and are a vital component to developing quality synth patches.

So let's take a look at them...

What is an Envelope?

An envelope, simply put, controls a parameter of a sound over time.   This is generally used to control the volume of a sound or the filtering of a sound, but can be used in many other ways to great effect.

There are a few different types of envelope out there, but the most commonly used one where synths are concerned is the "ADSR" envelope.   Let's take a look at what that means...

What does it comprise?

The ADSR acronym stands for...

Attack

This is how long the sound takes to build up to full volume.   For example, when a violin is played, the note gets louder over time until it hits the full volume - increasing the attack can emulate this.

Decay

The decay time defines how long it takes to go from the full volume down to the sustain volume.   This can be very short, like a piano note that is loud to start and then quieter as the note continues, or quite long if the synth is less conventional.

Sustain

Sustain time is how long the note can be held down for before fading out.   This can sometimes be substituted for sustain level, which implies the note can be sustained forever and instead defines the volume at which the sound is sustained.

Release

This is the time taken for the sound to fade to zero volume after the note is released.   Again, a piano is a good example of this - when you press a key and let go immediately, there is a period of time where the note fades out, rather than stopping dead immediately after letting go of the note.


Some useful techniques

1. Filter Plucks

By routing an ADSR envelope with a very small decay time (around 400-600ms should do the trick!) to a low-pass filter's frequency, you can get that plucking sound that is heard in all kinds of music from trance to dubstep!

2. Sweeping Pads

Like strings, by increasing the attack, you'll really feel your pads swell up when they are held down for a while - if you make the filter envelope's attack even longer than that of the amp envelope, you'll have an even more dynamic sound that changes over time.

3. Punchier Percussion

Sometimes called shaping, by running your samples through envelopes you can change their dynamics - a snare can be made snappier, a Bass drum can have a quick high end click then filtered down to a low end rumble... thanks to envelopes, there's loads you can do to make your percussive samples different!

Thursday, 11 March 2010

Introduction to Filters

Following on from last week's blog on Filters, this week we'll delve into the fascinating world of filters.

These useful devices allow you to mould the sounds you generate from your oscillators or with samplers into entirely new entities - changing a harsh lead into a warm pad, a deep bass into a piercing effect... they are seriously handy.

So let's get started...


What is a filter?

In music production terms, a filter is a device that allows you to remove certain parts of the frequency spectrum from a sound.   They are often used to make the piercing and plain sounds developed by oscillators into more useful synth patches by removing frequencies that might overlap with other synths, meaning they will sit in the mix better and sound much more defined.

A filter usually comprises a frequency knob, to define the point at which it filters the sound, a resonance knob to give access to more wild and wonderful sounds and sometimes an envelope to give more control over how the filter affects the sound over time.


What types of filters are there?

There are lots of filters out there, but some of the most popular ones are...

Low Pass Filters

Useful for: Bass Synths, Pads

These allow you to only let the low end of the sound pass through, attenuating the piercing high end of a sound and leaving you with the pleasant rumble of the subwoofer to fill out the bass end of your productions.

Band Pass Filters

Useful for: Radio effect vocals, mid-range pads

A cool filter that removes both the high and low end around a certain point, leaving a narrow band of frequencies audible which can dramatically change the sound of a synth.

High Pass Filters

Useful for: Lead synths, filter sweeps

The opposite of Low Pass Filters - these only allow high frequencies through.   This is great for making high end percussion or piercing lead synths that give the instrumental hooks of your productions!

Notch/Peak Filters

Useful for: Modulation

Notch and Peak filters cut and boost a small band of the frequencies in the sound put into them respectively.   To make more interesting and dynamic synths, adding a notch or peak filter and linking it to an LFO can add a texture to the synth that makes it cooler to listen to when it's played over a long period of time.  


Some useful techniques

1. Filter Sweeps

By automating the frequency setting of a low, band or high pass filter, you can achieve an awesome sound - reminiscent of when you surface after diving in a swimming pool.   The change in frequency content over time is great for build-ups and is a staple technique in dance music the world over.

2. All-encompassing Telephone Effects

Want a section to be brought down a bit?   To make a part of the song less of a focal point, run it through a band-pass filter and then when you want the music to kick back in, simply turn it off and blammo!   You punch the listener in the face with all the low and high frequency content they were missing!

3. Tidying up your mixes

Ever find your mixes are too muddy?   Try using filters to drastically remove parts of the sounds from synth, giving the other layers room in the mix to shine and not have to fight for precedence in the listener's ears!

Thursday, 4 March 2010

5 bits of kit to make live electronica fun

One of the main criticisms levelled at electronic music is the lack of the live element - but it doesn't have to be that way!  

Here are 5 pieces of electronic music gear that can make live performance infinitely more interesting...


1. Electronic Drum Kit

Instead of having all your percussion pre-sequenced, how about banging out those beats yourself with a drum kit!   With a wealth of triggering options available on most electronic kits these days, you could pretty much trigger the whole song live if you felt the need to do so!   This can also help add that live sounding element to kits, with velocity-sensitive pads meaning the quiet and louder hits are as distinctive as they need to be.   I guess you better start learning to twirl some drumsticks...


2. Akai MPC

If full-on drumming seems too much like hard work, take to the MPC - what it lacks in the ability to look rock n' roll, it makes up for in the skill you need to operate it adeptly - if you want you could use all the fingers on both of your hands, along with your feet, nose, chin and any other appendage you'd care to use (I'm not going there...) to operate it, making it potentially more impressive than a conventional kit where you only have 4 limbs to worry about!


3. MIDI Guitar

All the best stage moves come from guitarists, so take your samples and synths to the fore and trigger your noises whilst doing a flying kick, a knee slide or back flip (I'm assuming you're a competent gymnast) to impress that crowd!

4. Kaoss Pad 3

It almost goes without saying that the Kaoss Pad is one of the biggest innovative products to come out in a good while - the KP3 is the greatest yet, with the functionality to control sounds, loop samples quickly (great for insane live vocal stuttering!) and even reshuffle loops in real time.   Seriously fun to play with and seriously interesting to watch.


5. Pioneer DVJ-X1

A big part of live performance is in the visual aspect - and here you can control both the video as well as the audio simultaneously from one device!   The DVJ allows you to scratch DVDs in much the same way as vinyl, meaning you can make some seriously cool live video sequences to accompany the music!   Cool, huh?

Introduction to oscillators

When it comes to synths, there are some bits of basic synth theory that are useful to know.

At the core of those bits... lie oscillators.   Why, you ask?   I'll tell you... 

What is an Oscillator?

Not to be confused with an ostrich, an oscillator is an electronic circuit that produces a repeated electronic signal.   Ostriches lay eggs, run fast and are the largest living flightless bird - just to clear that up.

Basically, these are the clay of your synth sounds - the part that the rest of the sound will moulded from.   There are several different types of oscillators, but we'll be concentrating on your regular, run-of-the-mill oscillator for now.


What sounds can it make?

So your oscillator makes a repeated signal, but depending on the type of wave it repeats, the sounds can be vastly different. Let's go through some of the more commonly used ones...

Sine: This is the purest waveform you can get - a curve that produces a smooth sound that's perfect for deep, sub-bass sounds or piercing and pretty leads.

Pulse: Here's a sound that's a bit more harsh - by quickly alternating between the top and bottom of the wave, this makes what looks like a castle's crenellations and sounds like a hollow, blippy (or bloopy in the lower frequencies - it's important to get this terminology correct) note!

Triangle: Similar to the sine wave, except instead of curves it has straight lines. This gives a slight edge to the sound, but not as much as a...

Sawtooth: This is the harshest sounding wave, ramping up then sharply down and resulting in a piercing and powerful sounding wave that can be manipulated into all kinds of brilliant lead synth sounds.


Some useful techniques

Just so you're prepared to take on the world of oscillators, here are 3 useful techniques to remember when using them...

1. Using multiple oscillators and detuning them slightly can make a very powerful synth sound - this is great for those huge trance lead synths or some dirty drum and bass basslines.

2. Don't just settle for the oscillator on its own without experimenting; try playing with filters, distortion and other effects to get it sounding better!

3. If you really want to master oscillators, try producing some chiptune - this genre of music forces you to strip things down to the bare minimum and you'll find yourself using simple waves time and again!